Netbooting OpenBSD — and more!
This document's primary intended purpose is to guide one through the process of netbooting into OpenBSD on a SPARC box. Its ancillary purpose is to impart enough working knowledge for one to netboot NixOS on an AMD64 box. It will also cover a bit of netboot.xyz, some of iPXE (an open source implementation of the Preboot eXecution Environment), Open Firmware (also known as OpenBoot), and a tiny amount of Forth programming.
Manuals one will want to have handy for reference —
 arp(4)
 arp(8)
 boot_sparc64(8)
 biosboot(8) — amd64-specific first-stage system bootstrap
 boot_sparc64(8)
 cu(4)
 dhcpd(8)
 dhcpd.conf(5)
 dhcpd-options(5)
 diskless(8)
 eeprom(8)
 ethers(5)
 hosts(5)
 mountd(8)
 netintro(4)
 pxeboot(8)
 rarpd(8)
 rpcinfo(8)
 tftpd(8)
All of which can be found at https://man.openbsd.org/
Files one will encounter —
 /etc/bootparams     Client root and swap pathnames.
 /etc/dhcpd.conf     DHCP daemon configuration file.
 /etc/ethers         Ethernet addresses of known clients.
 /etc/exports        Exported NFS mount points.
 /etc/fstab          Static information about the filesystems.
 /etc/hostname.$if   Interface-specific configuration file.
 /etc/hosts          Host name database.
 /etc/myname         Default hostname.
 /etc/mygate         Default gateway.
 /tftpboot           Location of boot programs loaded by the Sun PROM.
 /usr/mdec/ofwboot.net  Network bootstrap
 /bsd                Default system kernel
 /bsd.rd             Standalone installation kernel, suitable for disaster recovery
A short search on eBay will present one with many choices concerning Sun Ultra Workstations. I purchased an Ultra 5, 10, and 30 for less than $500 all told.
One can easily install OpenBSD on a 40-pin IDE drive but they'd give up the ghost sooner or later. I also purchased a few cheap SSD drives from Amazon.com and a 40-pin IDE to SATA converter from Startech.com.
One will likely encounter a message about IDPROM contents being invalid during the power-on self-test (POST). Seeing as the unit's NVRAM chip probably died at some point in the last 20 odd years, this makes sense. At first, as I searched for ways to repair the chip, I only found posts from hardware hackers explaining how to retrofit (piggyback) a lithium coin battery onto it. I didn't have any time for that nonsense, so I snagged the M48T58Y-70PC1 from DigiKey and swapped it out. The chip is easy to find on the Ultra 5 and 10. It'll be resting in a plastic cradle that is either black or green depending. The new chip doesn't have to be put into this cradle, but there's no harm. In the Ultra 30, the chip is hidden behind the power supply, but the PSU is easy to slide out of the way for easy access to the chip.
 this post was originally titled 'Nemo in Network Dreamland'
Once the chip has been replaced and the machine booted, one should connect either via VGA and keyboard or serial console. If connecting via the latter, one will need a null modem cable or adapter both of which can be found at DigiKey or Amazon. You might want to have a gender changer handy as well.
One will most likely find oneself having to stop the boot process and enter the PROM. This can be done with a Sun Keyboard - (Type 5 or 6, 8 PIN) by pressing the key combination: STOP+A. This combo sends a break and will drop one at the ok prompt. If one were using screen to connect to the serial adapter (e.g., screen /dev/ttyUSB0) sending a break would consist of pressing the key combo: CTRL a b. If one decided rather to "call Unix" (or "call up") using the cu program then once one has connected one can ascertain what key sequence is needed to send a break by typing ~?, a command that prints a list of other commands.
When we've gotten to the PROM, it's time to program in the machine's Ethernet address:
ok set-defaults
1 0 mkp
80 1 mkp
8 2 mkp
0 3 mkp
20 4 mkp
XX 5 mkp
YY 6 mkp
ZZ 7 mkp
0 8 mkp
0 9 mkp
0 a mkp
0 b mkp
XX c mkp
YY d mkp
ZZ e mkp
0 f 0 do i idprom@ xor loop f mkp
Where "XX:YY:ZZ" are the last 3 bytes of the Media Access Control — MAC address — for the machine. If one were to examine the NVRAM chip from the machine it would likely have a yellowish sticker affixed with a labeled bar code with six hex digits printed underneath.
Having carefully entered the above commands, one will have done about all the Forth programming one would have to do. Issue the reset command and check via banner after the machine comes back up whether the Ethernet address stuck.
One could set-defaults if one likes. It's always nice to have a fresh slate. One can print the environment to get a sense of what's what via printenv while setenv sets env vars (e.g., setenv auto-boot? false).
OpenBoot provides a programmable user interface that gives us access to an extensive set of functions for hardware and software development, fault isolation, and debugging. Asking for help is always a good first step when learning something new:
helpwithout any specifier, displays instructions on how to use the help system and lists the available help categories. Because of the large number of commands, help is available only for commands that are used frequently.
Since we're hoping to netboot, it might be wise to test the network connection —
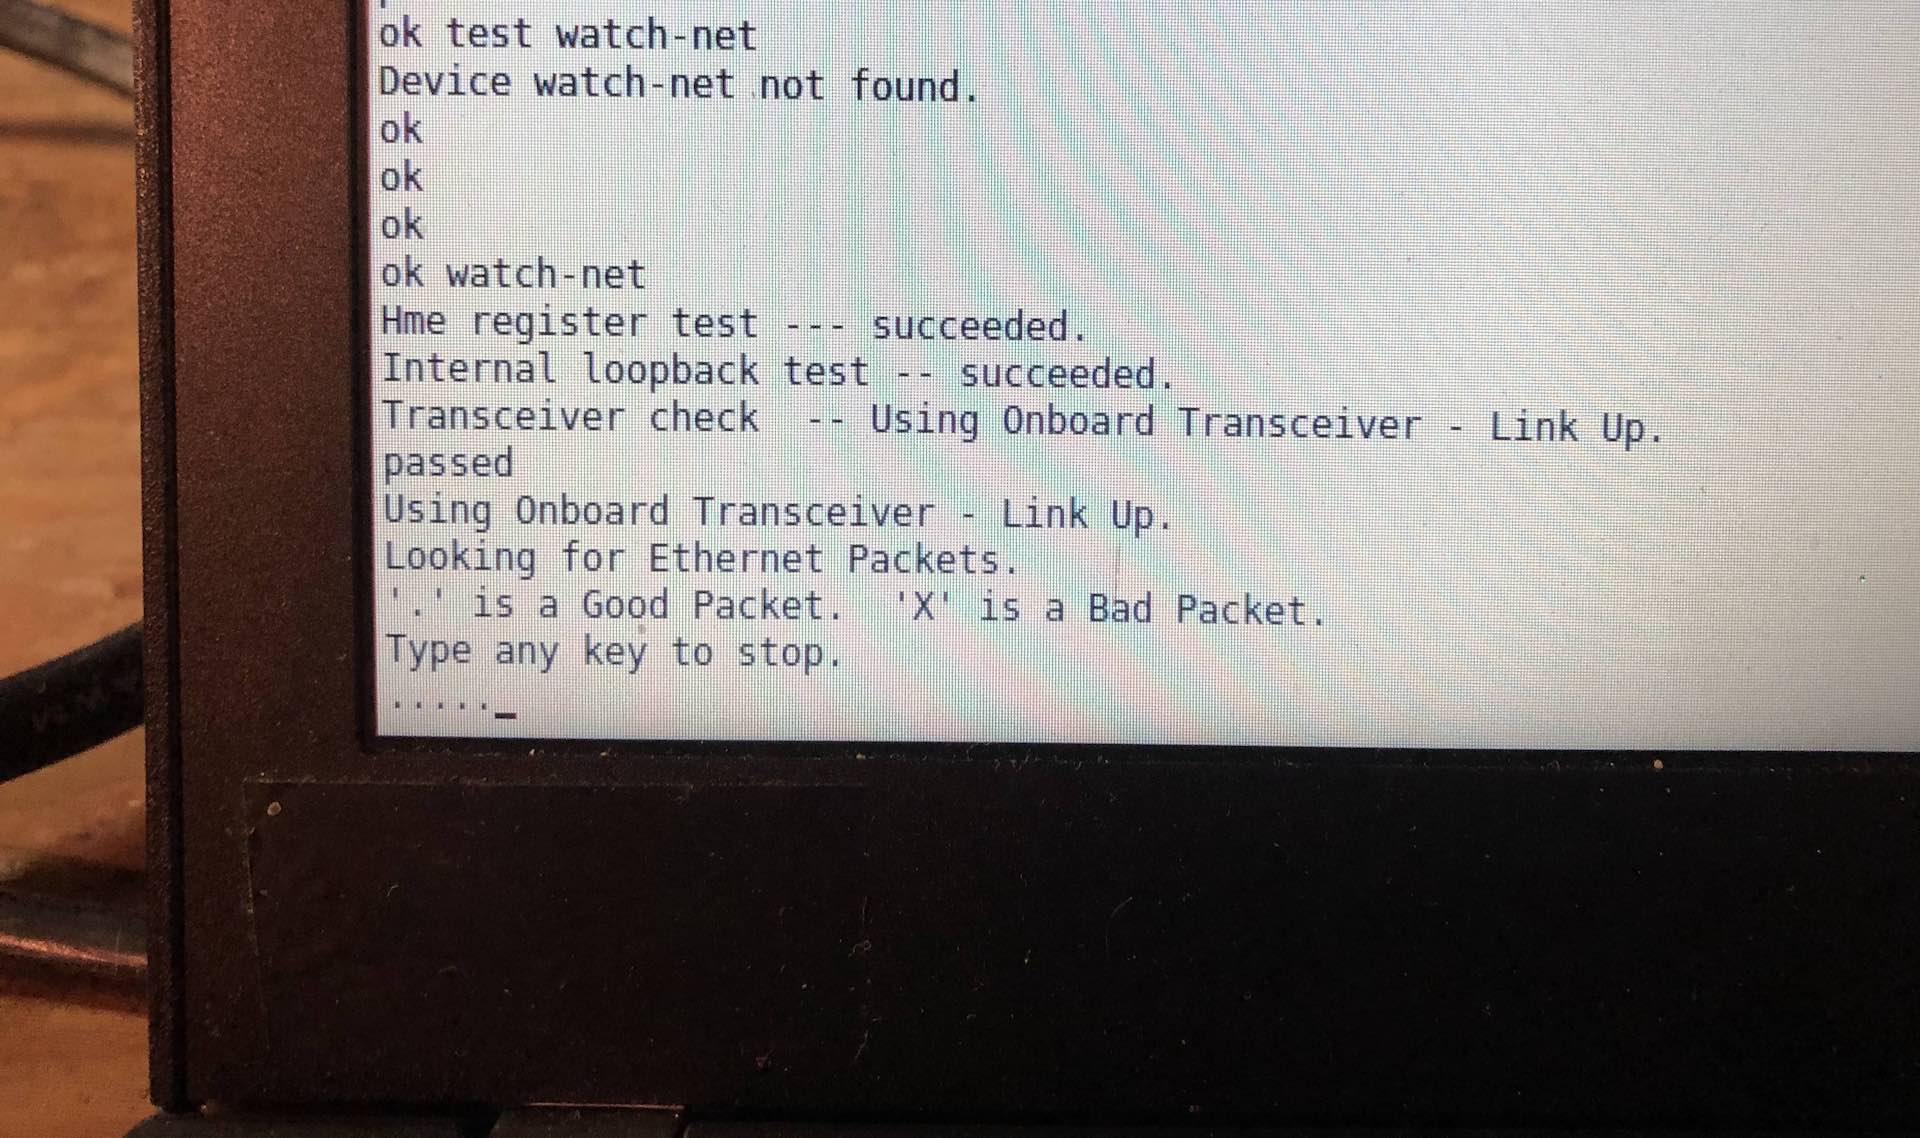 one can test devices and issue commands
If we're receiving good packets, this means the client is ready. The boot server, in my case, became the Ultra 10's new job. Keep in mind that some of what is to be discussed further below depends on what architecture one is trying to netboot. Unless otherwise noted, one can assume the client is a SPARC64 box.
Luckily, my Ultra 10's CD-ROM drive is in decent shape and it was rather painless to download, verify, and install the OpenBSD 6.9 ISO (International Organization for Standardization) to a CD-R. Sadly, the 5 and 30's respective drives had given up the ghost. Replacement parts are easy to come by but it shouldn't matter since we plan to netboot them anyway!
Let's take a look at what our client is hoping to see once the boot net command has been issued at the ok prompt. By the way, you can adjust the boot order by setting the boot-device environment variable via setenv.
Okay, let's go ahead and boot from the network...
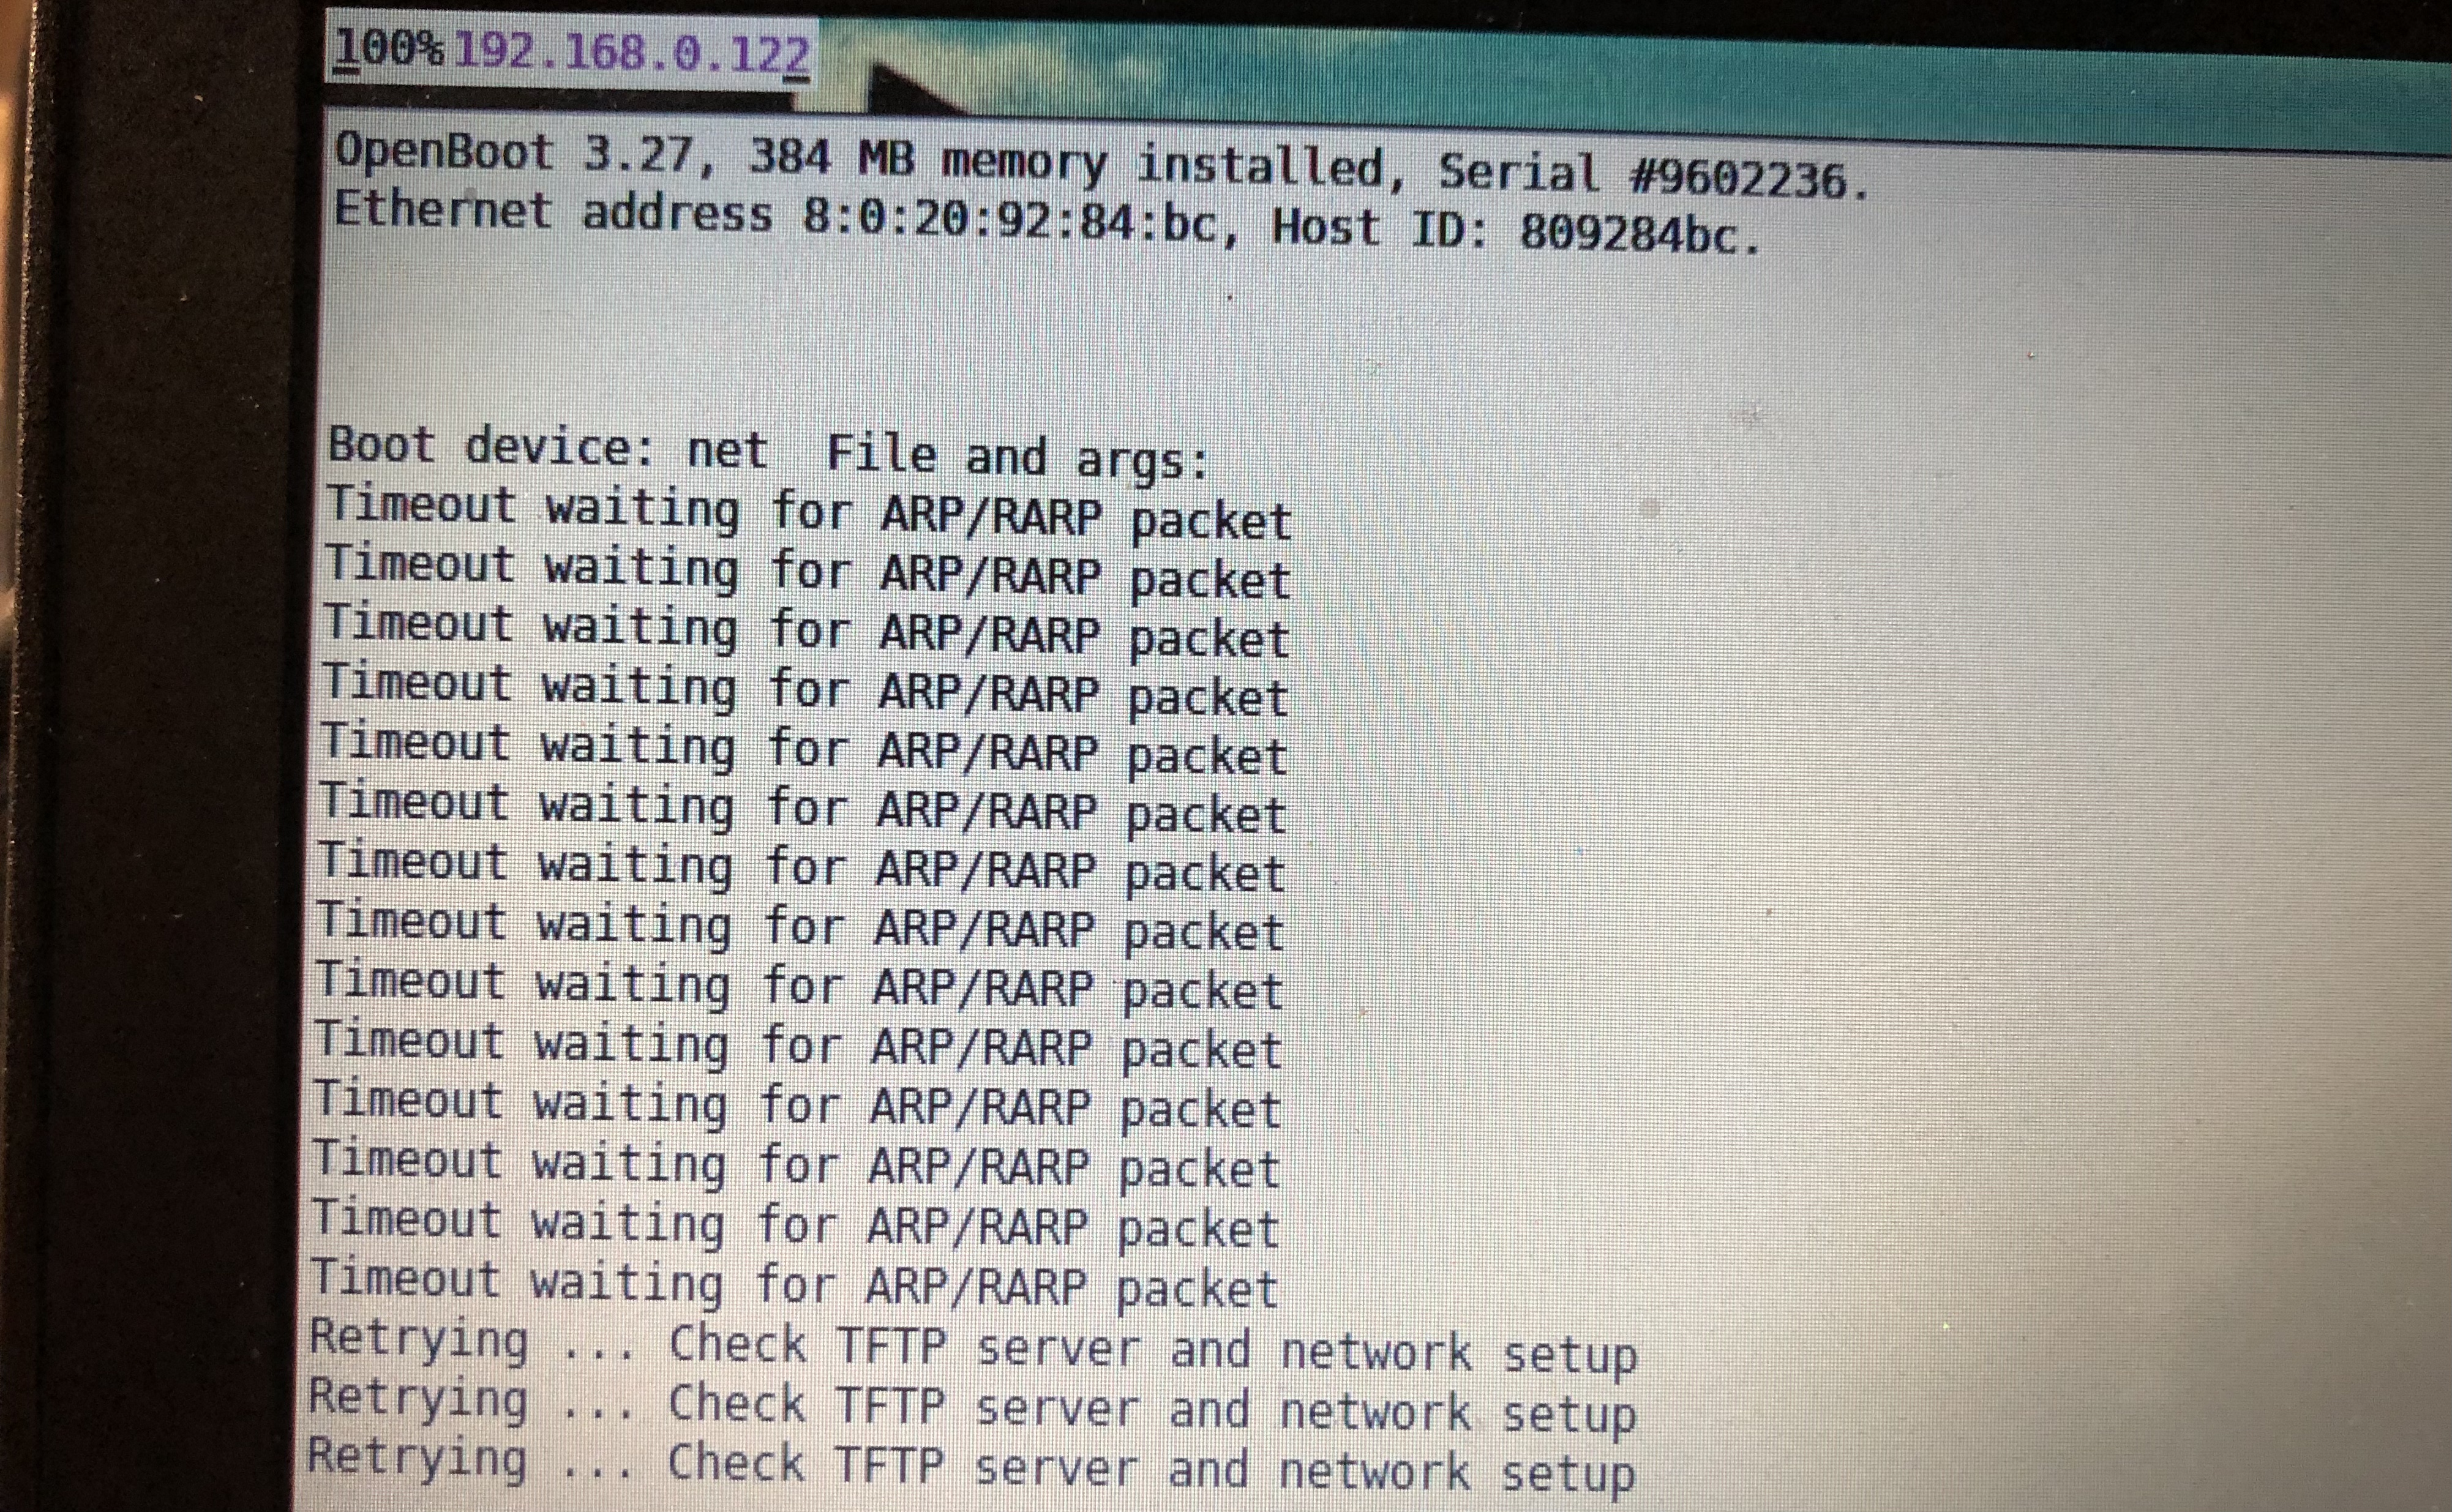 Retrying...Check TFTP server and network setup
Thankfully, the client offers advice as to what to do next.
Setting up a reverse ARP server is dead simple with rarpd. By default this process forks and runs in the background (it's a daemon after all) but if one were to run it in the foreground and pass it the -d flag they'd be better equipped to debug issues. A bit more on rarpd from its manual page:
Upon receiving a request, rarpd maps the target hardware address to an IP address via its name, which must be present in both the ethers(5) and hosts(5) databases.
As mentioned earlier, /etc/ethers contains addresses of known clients such that an example entry appears thus:
08:00:20:00:02:CD SNAFU # or the client's actual name
According to the kind editors of Wikipedia:
MAC addresses are primarily assigned by device manufacturers, and are therefore often referred to as the burned-in address, or as an Ethernet hardware address, hardware address, or physical address.
Keep the above in mind as you try to make sense of why we have so many names for seemingly one thing.
but, I don't want to worry about the link layer...
The world is a jungle in general, and the networking game contributes many animals. At nearly every layer of a network architecture there are several potential protocols that could be used. from RFC 826
Address resolution provides dynamic mapping between two different forms of addresses: 32-bit IP addresses and whatever type of address the network interface uses. This network interface's hardware address (often an 48-bit ethernet address) is what the device driver software will need to know in order to route the incoming IP datagram. The device driver never looks at the destination IP address of an incoming IP datagram. Again, the function of ARP is to map two addresses (the logical IP address and the physical hardware address).
A diskless system would read its unique hardware or physical address from the interface card (device) and send an RARP request (a broadcast to the network) asking for someone to reply with that diskless system's IP address. This is the job of the DHCP server. Below is an example of rarpd getting a packet and sending a reply:
server# rarpd -a -d
hme0: 8:00:20:00:01:AB # server ether
      192.168.0.1 # server IP
rarpd: got a packet
rarpd: 08:00:20:00:02:CD # client ether
rarpd: reply sent
Once the diskless system has its IP said system should then probe the newly received address with ARP.

a trivial matter: TFTP
TFTP is a "simple" protocol designed to fit in read-only memory and be used only during the bootstrap of a diskless system. Back in the before times, computer manufactures did not have a standard way to bootstrap systems and thus all had a different way of accomplishing the same thing. TFTP was created to standardize the process and provide some uniformity.
The fact that TFTP is a rather slow protocol is not a serious concern, due to the fact that it need be used only for the primary bootstrap. A secondary bootstrap could use a faster protocol. from RFC 906
Concerning security and TFTP ... there isn't any: no provisions for a username or password exist. Furthermore, TFTP is using the unreliable protocol, UDP. These factors help keep TFTP simple and small.
Due to the lack of authentication information,
tftpdwill allow only publicly readable files to be accessed.
OpenBSD provides the tftp program which can be used to issue commands. Coupled with the daemon above, one can test via tftp to see if one's bootserver is properly running tftpd.
Bootloaders reside in a chroot environment within /tftpboot on the bootserver.
If the client's PROM fails to fetch the expected file, tcpdump(8) can be used to discover which filename the client is trying to read.
In the case of the Sun machines, the boot program is accessible as a file named using the client's IP address in hex. For example, using awk the result of the following:
echo 192.197.96.12 | awk -F . \
  '{ printf "%02X%02X%02X%02X\n", $1, $2, $3, $4 }'
would be C0C5600C.
Recall that the OpenBSD bootstrap program is named "ofwboot" (open firmware). Here, as elsewhere, NetBSD and OpenBSD share similarities. If one wanted, one could instead netboot into NetBSD following the same method. In either case,
cd /tftpboot
ln -s ofwboot.net C0C5600C
When the client asks, our bootserver will reply and load the first stage bootloader. Some Sun clients request the file name with an "arch" suffix (e.g., C05600C.SUN4).
The UltraSPARC Open Firmware will normally look for a bootloader on the device specified by the boot-device variable. The OpenBSD bootloader will then look for a kernel named bsd by default, unless the boot-file variable is set, or a different filename has been specified in the boot command.
dhcpd setup
The manual can be cryptic and nothing clears things up better than an example:
option  domain-name "my.domain";
option  domain-name-servers 192.168.1.3, 192.168.1.5;

 subnet 192.168.1.0 netmask 255.255.255.0 {
    option routers 192.168.0.13;

    range 192.168.1.32 192.168.1.127;

    host static-client {
            hardware ethernet 22:33:44:55:66:77;
            fixed-address 192.168.1.200;
    }

    host pxe-client {
            hardware ethernet 02:03:04:05:06:07;
            filename "pxeboot";
            next-server 192.168.1.1;
    }
 }
(you'd find this in /etc/examples/dhcpd.conf).
It's worth mentioning that DHCP leases can be assigned almost any length from zero seconds to infinity. 7200 seconds equals two hours. Other common values one could use: 86400 (one day), 604800 (one week) and 2592000 (30 days).
It'll behoove you to have a look over RFC 2132. You've always known you'd one day find yourself wading through RFCs. It was only a matter of time. Endless reams of paper saved but just festooned to the screen instead.

I found myself tumbling around in dhcpd.conf some days annoying my poor wife when her many machines (some even strapped to her wrist, if you can believe that!) were calling and demanding their IPs but receiving none.
If you make changes to /etc/dhcpd.conf (as you surely will) be sure to have those changes reflected in reality by restarting the daemon with rcctl restart dhcpd.
I mentioned RFC 2132 because the myriad options you'll encounter (if you're using OpenBSD) are lifted direct:
The documentation for the various options mentioned [in the actual documentation] is taken from the IETF draft document on DHCP options, RFC 2132. Options which are not listed by name may be defined by the name option-nnn, where nnn is the decimal number of the option code. These options may be followed either by a string, enclosed in quotes, or by a series of octets, expressed as two-digit hexadecimal numbers separated by colons.
creating a root filesystem
Working in /export/mockingbird on the boot server, it's time to create our root filesystem using the OpenBSD/[arch]/[version] base binary distribution. One must install this distribution set for it contains the base utilities necessary for minimal system functionality.
After you've downloaded the sets, use signify to verify:
signify -C -p /etc/signify/openbsd-70-base.pub -x SHA256.sig bsd.rd # or base70.tgz
Next, populate the filesystem:
  mkdir -p /export/mockingbird
  tar xzphf *.tgz -C /export/mockingbird
  cd /export/mockingbird/var/sysmerge/
  tar xzphf etc.tgz -C /export/mockingbird/
  tar xzphf xetc.tgz -C /export/mockingbird/ # if you added the xsets

  # in /export/mockingbird/dev
  ./MAKEDEV all

  echo "mockingbird" > /export/mockingbird/etc/myname
  echo "inet 192.168.0.2" > /export/mockingbird/etc/hostname.hme0
  # note that the Sun Happy Meal (hme) Ethernet device is specific to these Ultras
  # your interface might differ
  # set mount points in exported fstab
  # i.e., working in /export/mockingbird
  # add swap if you want
  # cat > etc/fstab <<-EOF
     192.168.0.1:/export/client /    nfs rw        0 0
     192.168.0.1:/usr           /usr nfs ro        0 0
    EOF
bootparamd or rpc.bootparamd
Be sure to review portmap(8) and rpcinfo(8), and rpc(5). Cursory glances (perhaps many) here and there will do, and trial and error will be employed.
Some routines that compare hostnames use case-sensitive string comparisons; some do not. If an incoming request fails, verify that the case of the hostname in the file to be parsed matches the case of the hostname called for, and attempt the request again.
For example:
  mockingbird  root=server:/export/mockingbird/root \
  swap=server:/export/mockingbird/swap \
When the client named "mockingbird" requests the pathname for its logical "root" it will be given the server name "server" and the pathname /export/mockingbird as the response to its RPC request.
Once you've setup the filesystem and exported it properly, now's the time to try to netboot again.
The PROM loads the boot program which in turn loads the kernel which does NFS mounts for root and swap.

PXE in brief
The PXE protocol operates as follows:
The client initiates the protocol by broadcasting a DHCPDISCOVER containing an extension that identifies the request as coming from a client that implements the PXE protocol. Assuming that a DHCP server or a Proxy DHCP server implementing this extended protocol is available, after several intermediate steps, the server sends the client a list of appropriate Boot Servers. The client then discovers a Boot Server of the type selected and receives the name of an executable file on the chosen Boot Server. The client uses TFTP to download the executable from the Boot Server. Finally, the client initiates execution of the downloaded image.
PXE can be used for newer clients to netboot OpenBSD. Accordingly, pxeboot(8):
The pxeboot boot program will look for an /etc/boot.conf configuration file on the TFTP server. If it finds one, it processes the commands within it. boot.conf processing can be skipped by holding down either Control key as pxeboot starts.
see: https://nixos.org/manual/nixos/stable/index.html#sec-booting-from-pxe
enter netboot.xyz
netboot.xyz is a tool that uses iPXE and allows users to boot into various Operating Systems or Live CDs. The bootloader calls to a webserver that hosts the iPXE source files. More or less, this means a public boot server.
If you are experiencing issues with the regular netboot.xyz.kpxe bootloader, you can try and use the netboot.xyz-undionly.kpxe bootloader. The regular bootloader includes common NIC drivers in the iPXE image, while the undionly loader will piggyback off the NIC (Network interface controller) boot firmware.
shotrcomings / TODOs
Ideally, X11 would work on these diskless workstations. Sadly, I keep getting the No Screen Found error. Clearly, it's just an issue with how the settings are exported on the bootserver.
References (Links)
- https://www.openbsd.org/papers/bsdcan2019_netboot.pdf
- http://cholla.mmto.org/computers/sun/ultra/nvram.html
- https://docs.oracle.com/cd/E19683-01/816-1177-10/overview.html#pgfId-1007990
- http://www.cs.columbia.edu/~sedwards/presentations/2019-vcf-netboot.pdf - wonderfully helpful!
- https://datatracker.ietf.org/doc/html/rfc826 - an internet standard!
- https://datatracker.ietf.org/doc/html/rfc5227
- https://datatracker.ietf.org/doc/html/draft-henry-remote-boot-protocol-00
- https://www.rfc-editor.org/rfc/rfc6842.txt
- http://sightly.net/peter/openbsd/netboot-sparc.html
- https://netboot.xyz/docs/faq#what-operating-systems-are-currently-available-on-netbootxyz

